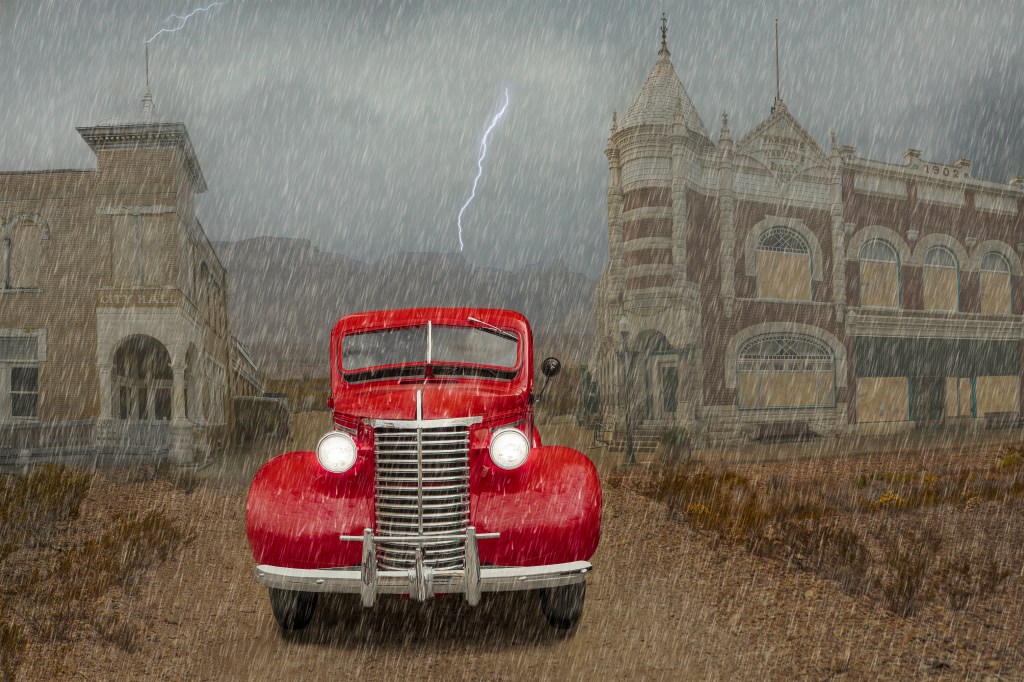
I have worked on this image for a very long time; always expanding its scope until I thought I had it done. However, while I liked the last version, it lacked an element that would make it look more realistic. That element was atmosphere. In the image, it is raining cats and dogs, yet everything was too sharp. Falling rain should make the buildings in the distance look foggy or blurred. So, I’ve added a bit of atmosphere so that image looks more realistic.
Scroll down to compare it to the previous image. I think you will agree that the atmosphere I created in the current image makes it look more realistic.
Every outdoor photographer wants a portfolio of spectacular images from spectacular places. That’s why so many of us travel to locations where we photograph iconic images like the Grand Tetons from Schwabacher’s Landing, Mesa Arch at sunrise or the Grand Canyon from Mather Point. While it is satisfying to capture those images, knowing that thousands or even millions of others have made virtually identical images, diminishes that sense.
What we all really want are spectacular images that no one else has photographed. How is that possible when virtually all the beautiful places in the world have been photographed and posted on social media sites like Facebook, Pinterest and Instagram? Some experts suggest that photographers need to find a new viewpoint when they photograph those iconic places. Of course, the problem with that is that the iconic images are already the best compositions for those sites.
Should we just give up photography? No, we should continue to make images. We should try to capture the subject with the right light using the best composition, making sure that the exposure and focus are right and that we remove any distractions that might be in the image. Of course, using all the best photographic techniques doesn’t guarantee a great image but good technique may create a piece of a spectacular image.
A piece of an image? Yes! I’ve been working to create new images from pieces of two or more photos. These images are not collages; they are totally new images that will never be made with a camera. In my collection of photos, I have found images of spectacular sights, but they often lack a good foreground or an image with a good foreground, just doesn’t have the background. By combining the two in Photoshop, I have created what I think are some very special images.
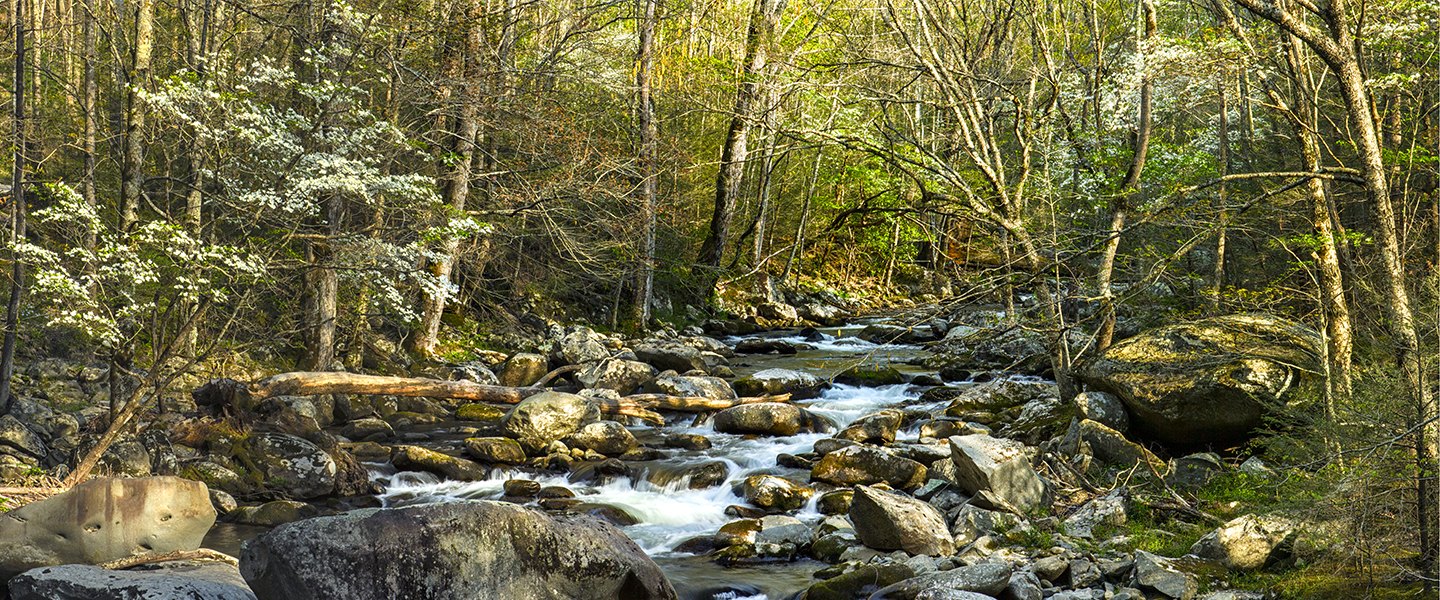
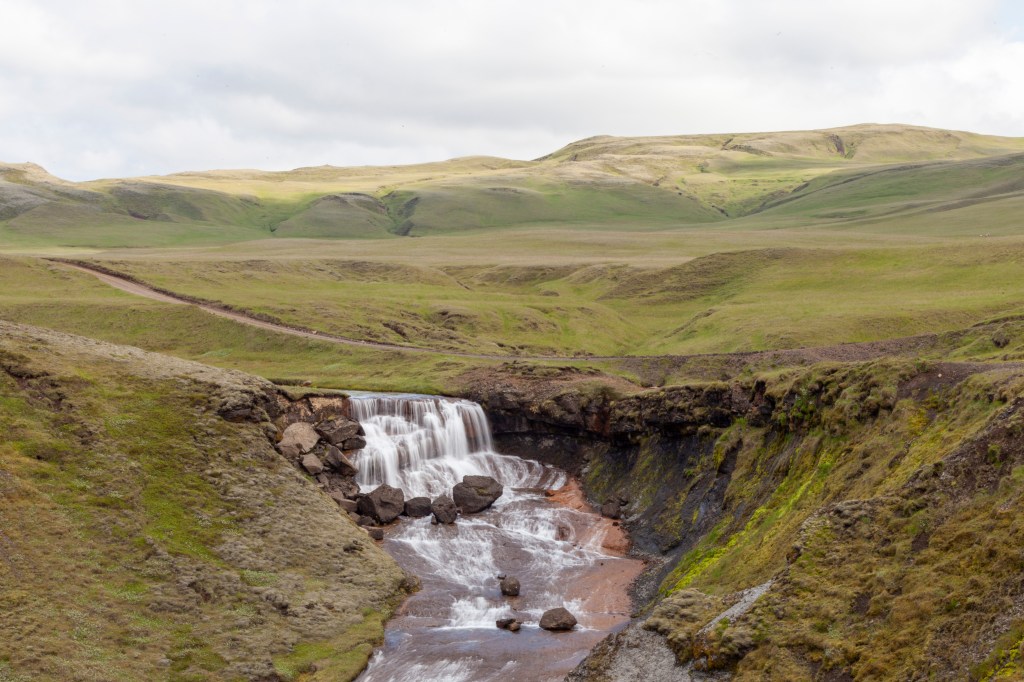
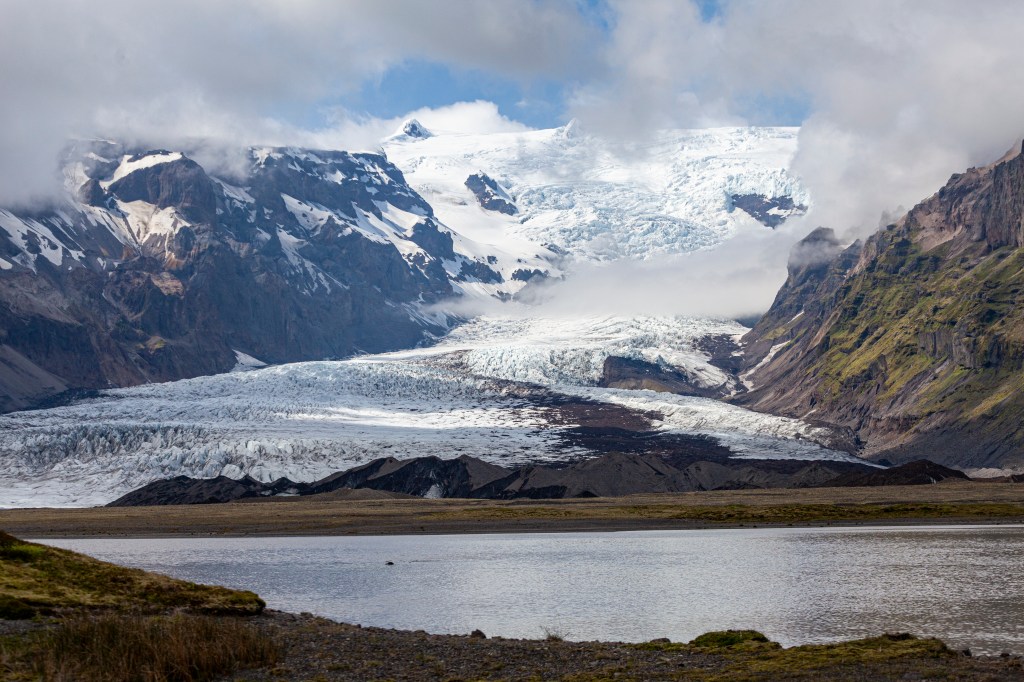
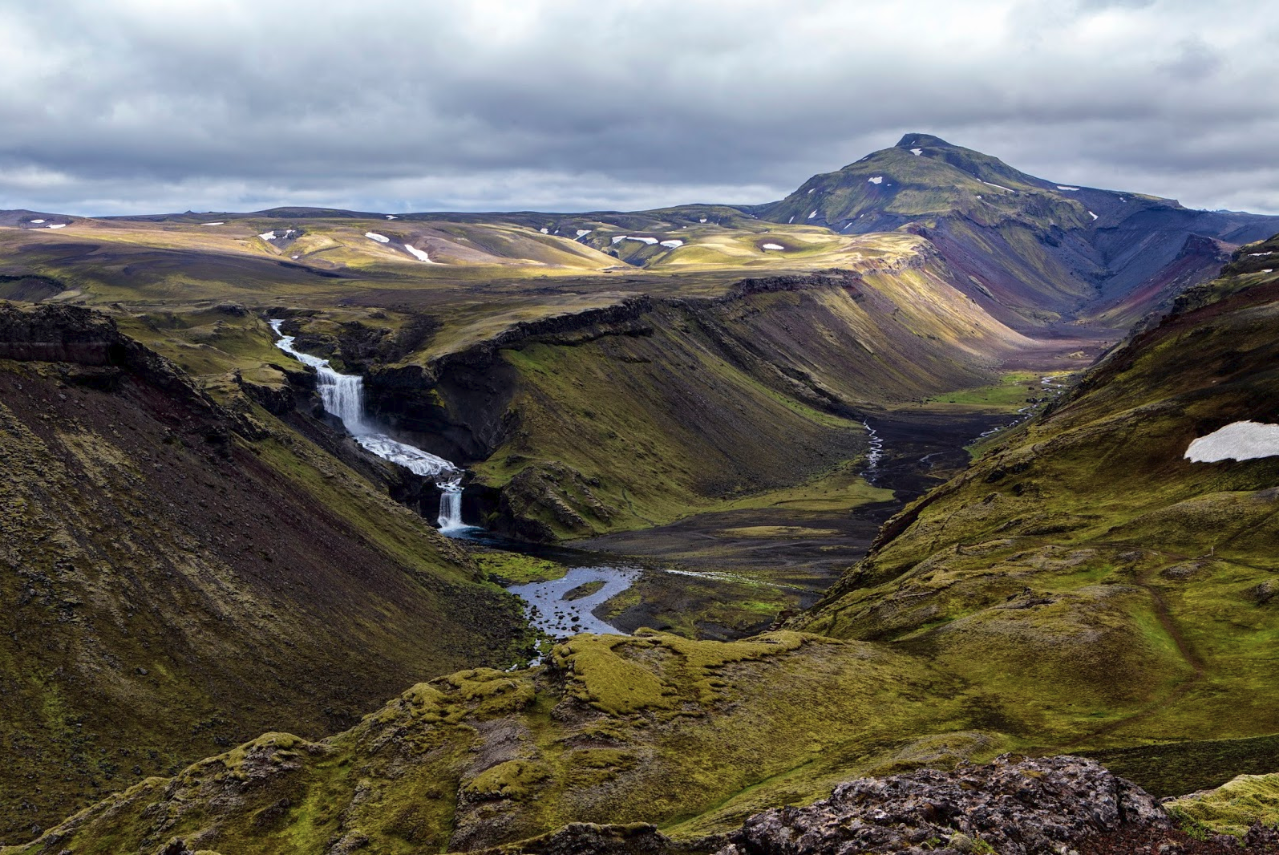
The waterfall image below is one I made in Iceland.
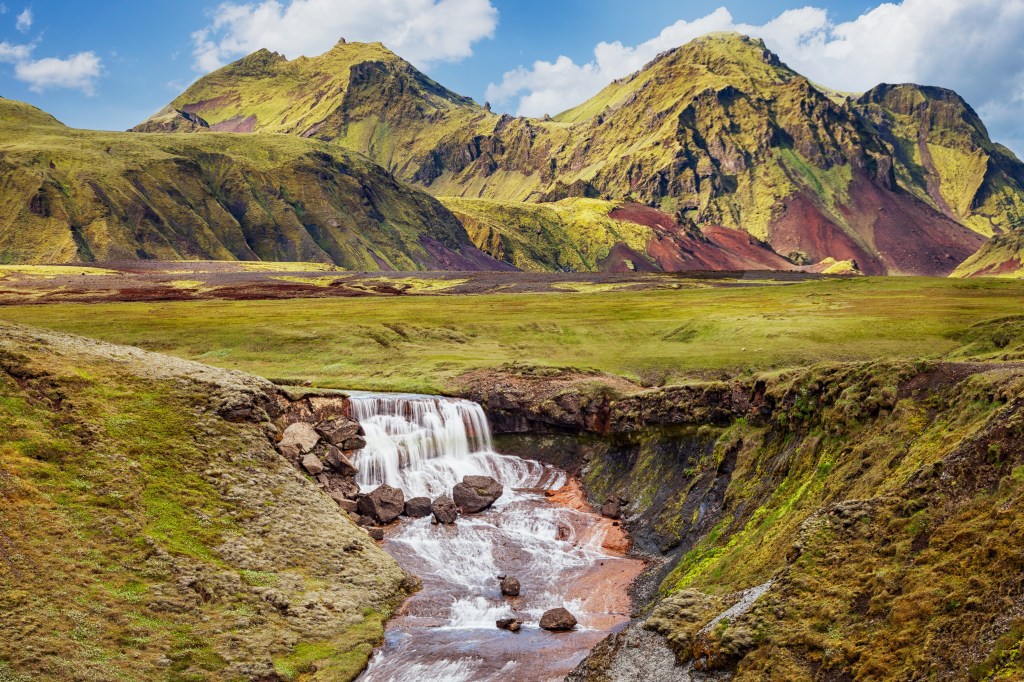
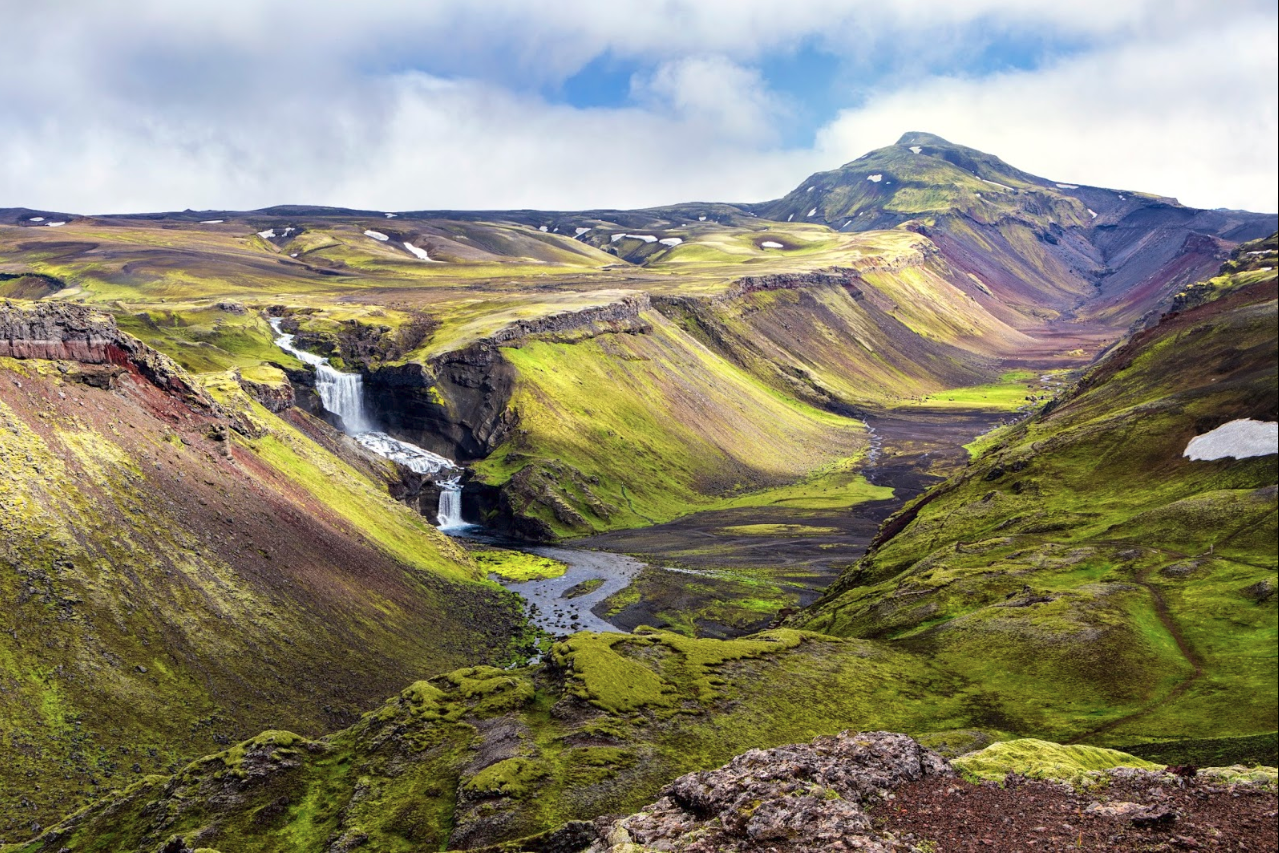
The waterfall is nice, but the background is uninteresting, so I replaced it with a much more interesting photo of Icelandic mountains.Replacing the background with the mountains made a much more spectacular photo.
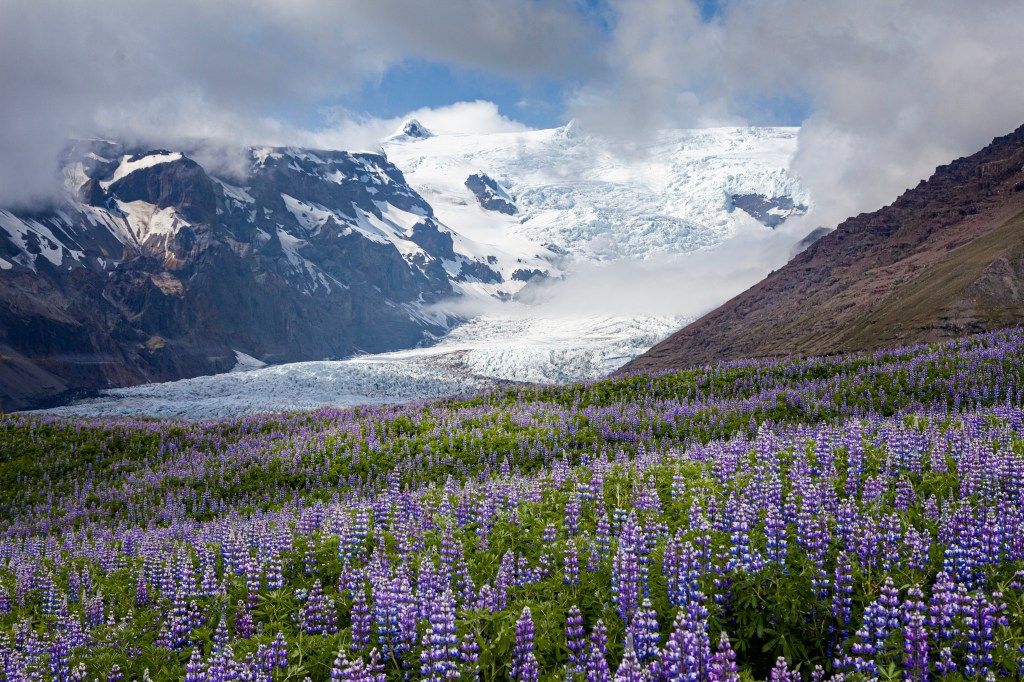
In the next image, I photographed a nice glacier making its way down the mountainside but the foreground was not very good. I replaced it with the foreground from another image and the final image is much better than the other two.
I really like this shot but the foreground isn’t very interesting. A better foreground makes a much better image.
This is a composite of six different images. The base image is the foreground. I added separate images of the mountains on the left and the right. I added a piece of another image that included the buildings and I extracted the horses from two different photos.
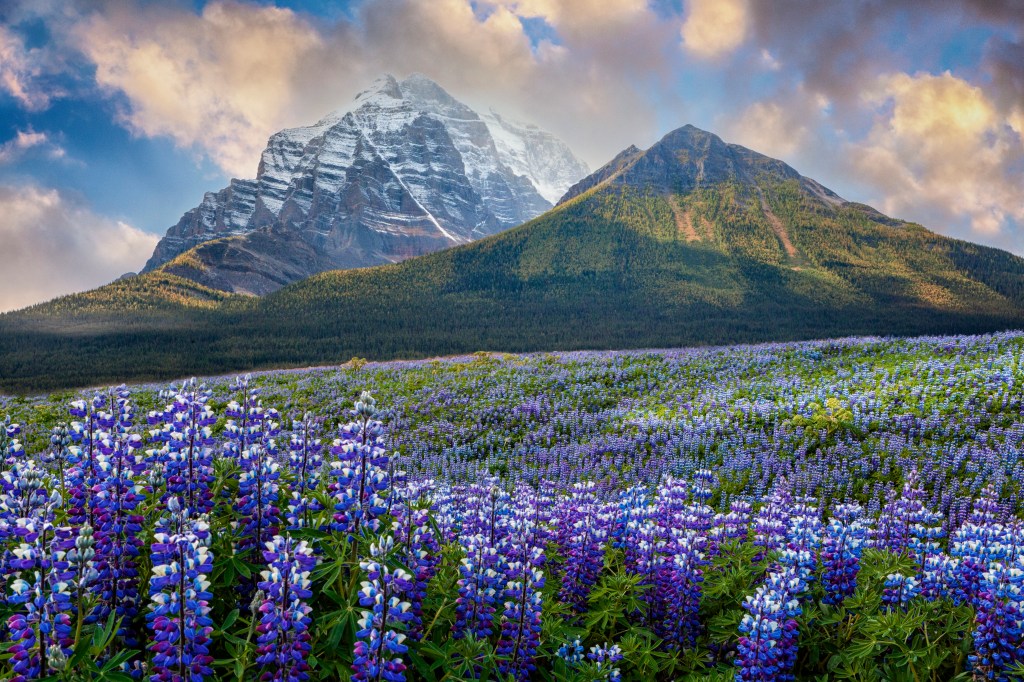
This is another composite. I photographed the lupines in Iceland and the mountains in the Canadian Rockies.
When all the beautiful places in the world have been photographed, the way to capture unique images is to create your own.
After looking at this image again, I figured that if the sky was dark and there was lightning, there must also be rain. So, I created rain for the image. One small but important detail that I missed at first was the windshield wiper. If it was raining hard, the wiper had to be on so I created that look.
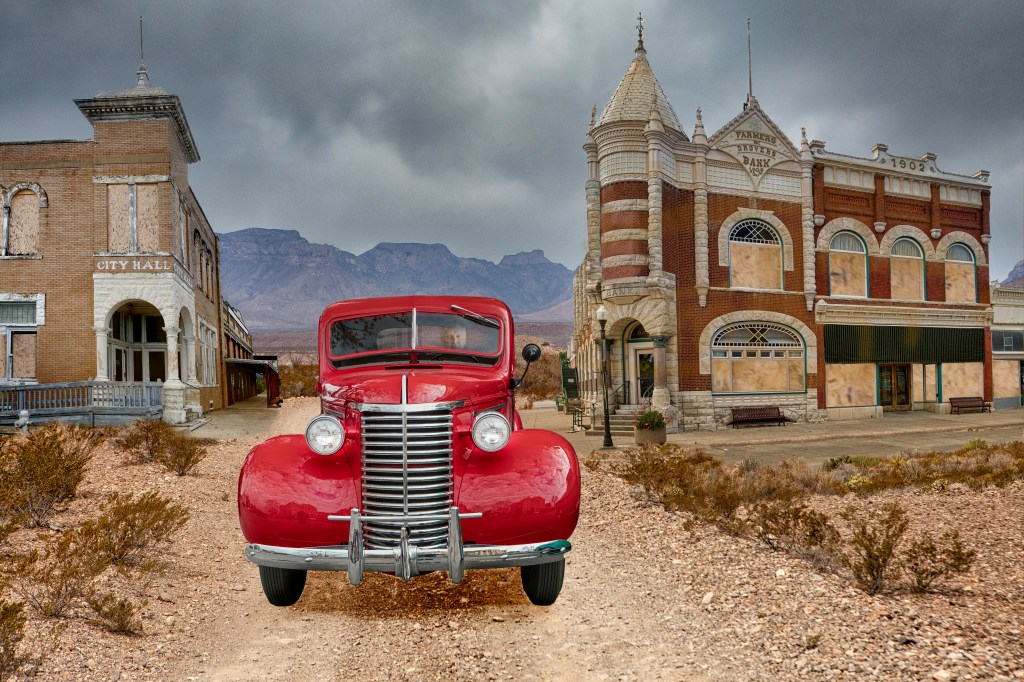
I’ve previously written about how hard it has been to stop working on some images. This is another one. You can see the original in the previous post. I think this is my final version. I wanted to create a mood that matched this unfortunate town. I think a brewing thunderstorm with its dark skies accomplished my objective better than the previous version. I am going to try to leave this one alone.
I have previously written about some of the altered reality images I’ve created. I have produced more and thought I should share them with my readers.
This is my most recent effort.
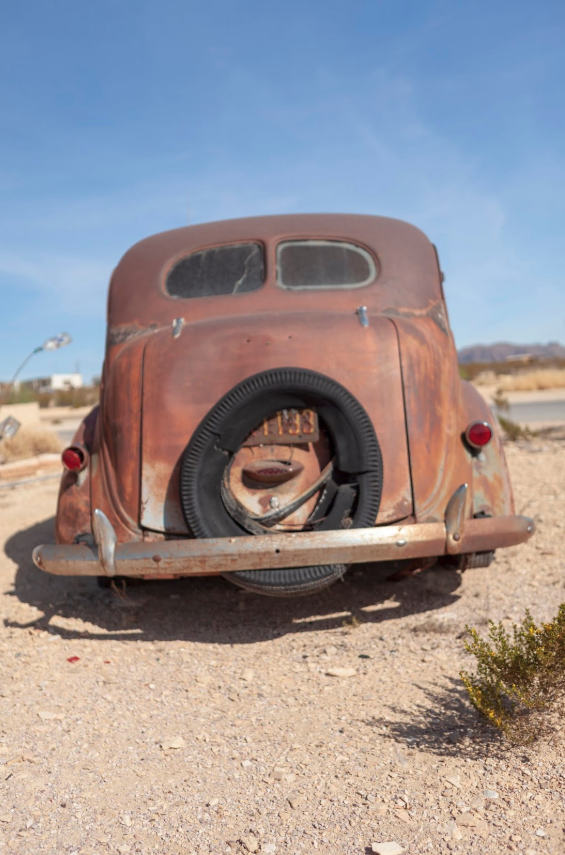
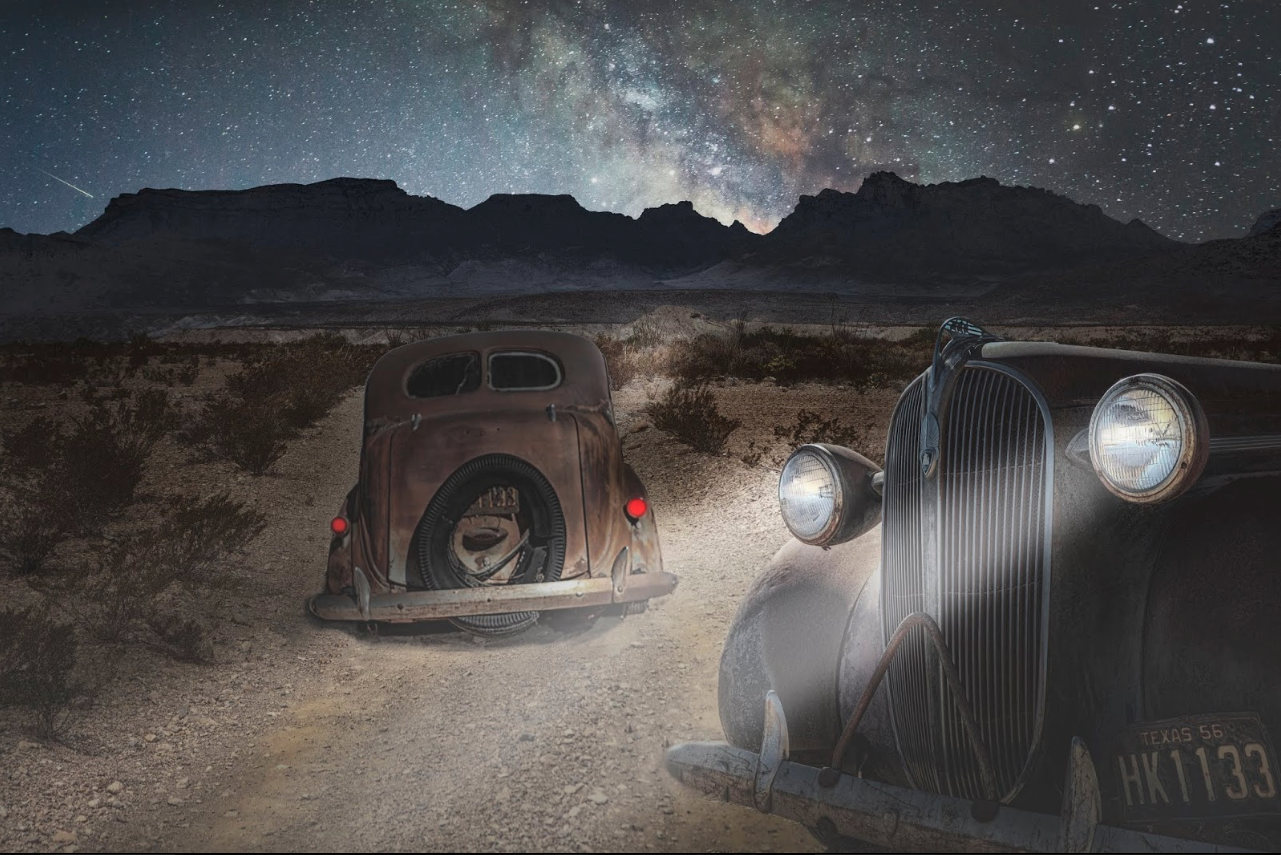
It is a composite image of a deserted desert town. I made it from the base image of a dirt road I photographed in Big Bend National Park. I photographed the City Hall in Granger, Texas, a semi-ghost town and the inspiration for the image. I captured the photograph of the Farmers and Drovers Bank in Council Grove, Kansas. It is a fully functional bank, but I boarded up the windows and removed a large time/temp sign in Photoshop in keeping with the theme of the image (a play on the word desert and deserted). I photographed the car at a car show and the driver is a self-portrait of yours truly. I replaced the sky with a one I photographed from my back yard. I thought it added to the gloom and enhanced the theme.
What to do with photos from car shows. I created my own show in a different image. This time I thought I would combine a car show with a model train. Because I had old cars, I needed an old train. Fortunately, I know someone who is into trains in a big way and he let me borrow one of his model steam engines. I photographed a railroad crossing at Wier, TX that didn’t have all the modern gates and flashing lights, added a couple cars from car shows I photographed in Texas and Minnesota and created this image. I added a little starburst to the brake lights too. The driver of the old Dodge is yours truly. Of course, I wasn’t actually driving the car, I just inserted an image. I had to add the smoke for this old engine, I added an effect to give the appearance that the engine was moving and I added an old film filter to give it that “retro” look.
This A-1 Skyraider Attack Aircraft is armed to the teeth and flying between the highway bridge and the Hoover Dam. Of course, this isn’t completely real. I photographed the canyon from the Hoover Dam and I photographed a beautiful model of the A-1 in my kitchen. Then I combined them in Photoshop to create this altered reality image. I had to add the shadow and add motion to the propeller. To create the propeller motion, I made multiple images of the plane with the prop in different positions. In Photoshop, I selected and saved the prop as a separate image. I used a different plane image to replace the body of the plane after I had removed the prop. I then applied a motion blur to the propeller and put it back on the plane.
Some altered reality images are very easy to create. In this one, I photographed the skyline of the city of Minneapolis from Lake Calhoun as the sun set. The background sky was very blah, so I gave it a new one using an image I made in Iceland. If only the skyline looked like this in real life!
In addition to the model airplanes my friend builds, he also does military vehicles, so I borrowed his M-4 Sherman Tank and made photos of it. I also photographed an empty field near my house and created this WWII battle scene using images of tanks, the field and fire and smoke from images I captured at the Liendo Civil War re-enactment near Hempstead, TX. I added a photo I made of the Boston skyline to complete the image. When people think of battlefields, most don’t realize just how much smoke encompasses everything.
I photographed these bleeding hearts from my patio. To try to get the perfect photo with my 180mm macro lens, I set my camera on a tripod so that the flowers would line up as close as possible in the same plane. I then measured the distance from the flowers to the camera. Finding it to be about 36 inches, I pulled out my depth of field app and determined that at f-11, I would get 3/8” in focus; enough to keep all the flowers sharp. I set my ISO to 800 and the shutter speed to 1/45 second and made the shot. The photo above was the result.
I liked the image, but I wanted to make it different than all the other bleeding heart photos in the universe so I searched through some of my old photos and found one I made in Marfa, Texas of a stained-glass window in an old church. It was something most photographers would have discarded, but I keep everything, and, in this case, I was very happy I did.
I made a composite, placing the stained-glass photo on top of the other image, applied a mask, painted over it to reveal the flowers and changed the opacity to 12% and the fill to 70% The result was better than I could have hoped for. I effectively changed the background while adding meaning to the image.
The glass window includes an inscription that says: “To the Glory of God and in Loving Memory of E.F. King Jr. 1918-1944”. It also has an image of a young “crusader” complete with shield and sword.
The final image tells a story of a family with broken hearts at the loss of the first son of the King family and their faith in God. For me, it makes a much more powerful image than what came out of the camera.
I’ve seen several beautiful photos recently that were nearly ruined by the fact that sharpening produced halos where sky met edges. What’s worse, the photographer could have easily removed them in Photoshop. With less than a minute of work, those halos could be gone.
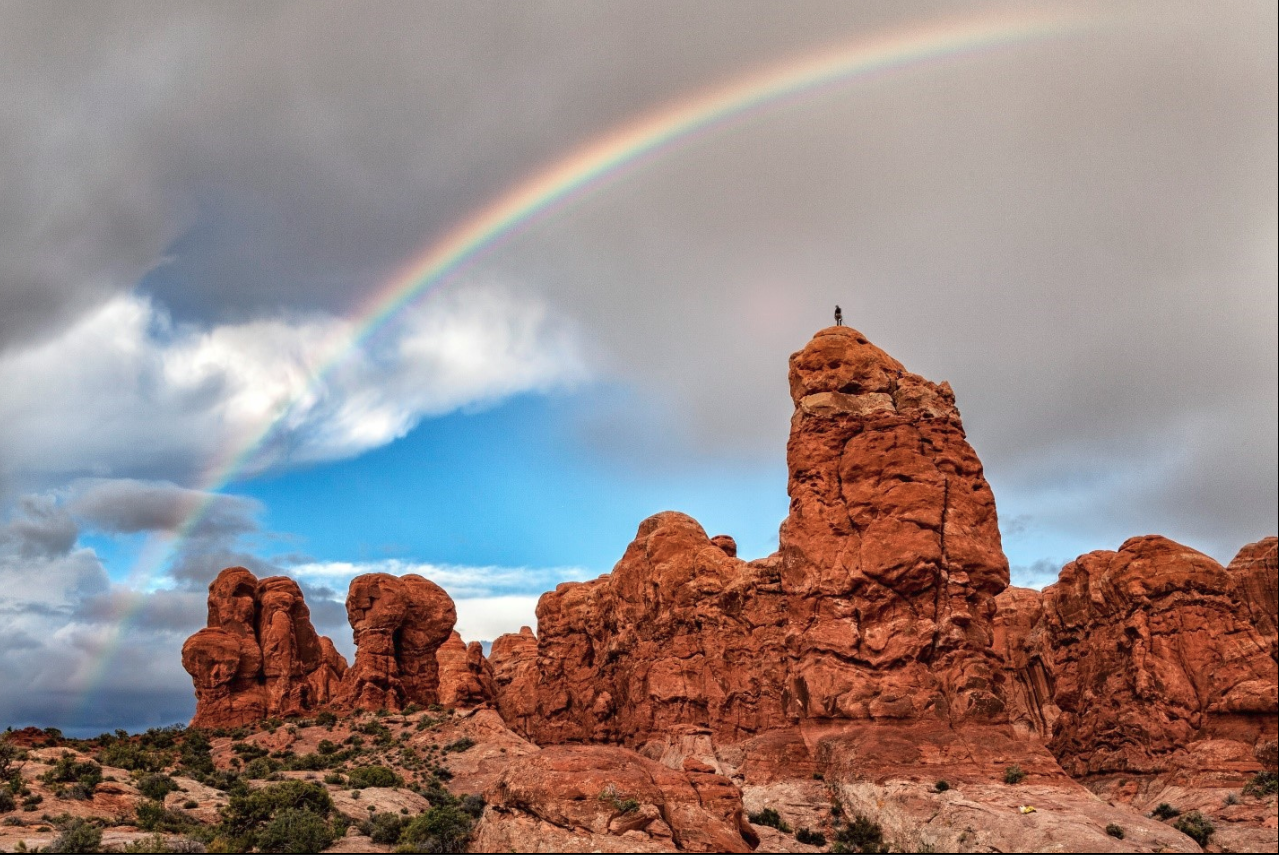
Here’s an example that illustrates what I mean.
I made this photo of a rock climber in Arches National Park. It’s a nice photo but if you zoom in, you will see the halos I’m writing about.
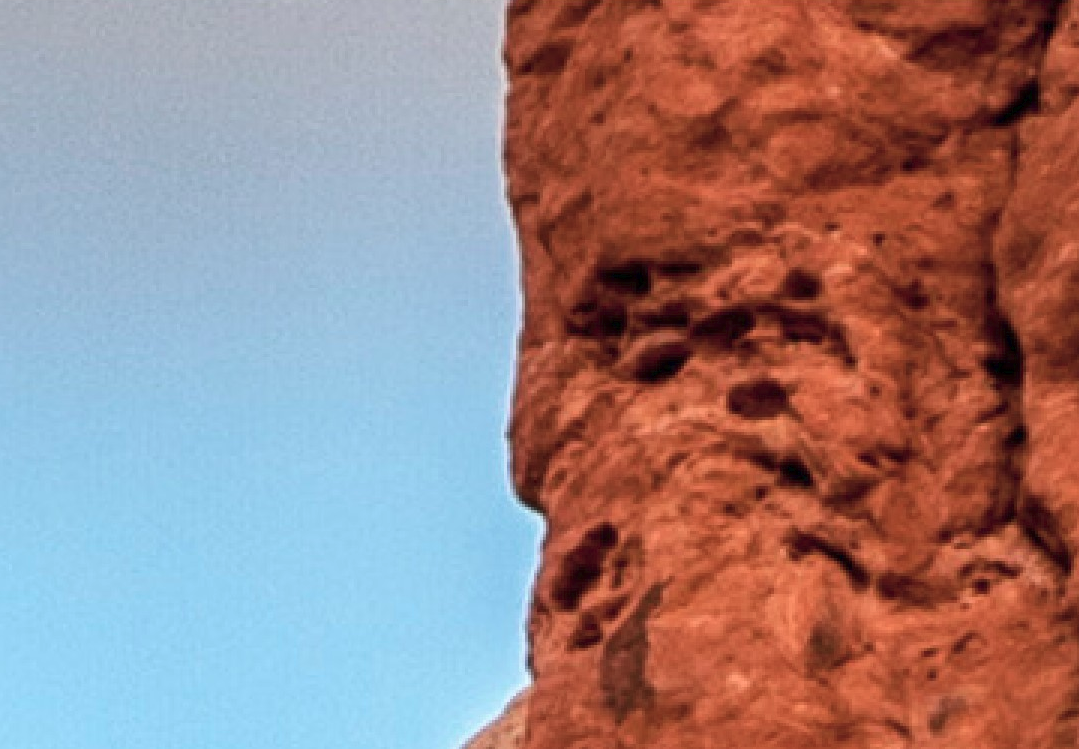
After sharpening the image, I was left with a halo around the edges.
Wouldn’t it be nice if you could simply take the clone stamp, select from the sky and paint the halo out, without affecting the rock? The good news is that’s exactly what you do. To get rid of those halos, (make sure you are working on a flattened or composite of your image) you simply change the blend mode of the clone stamp from Normal to Darken. The Darken blend mode tells Photoshop to replace pixels that are lighter than the selected area with pixels from the selected area BUT, only replace pixels that are lighter than the selected area. So long as the selected area is lighter than the adjacent rock, only the halo will be replaced.
Notice how the halo disappears without leaving any telltale signs on the rock. Brush size doesn’t matter, just make sure that opacity is set to 100%.
Unless you are very careful, your cloning can leave you with areas where the sky doesn’t match properly like in the image below.
To prevent this potential issue, you can use a little different approach to removing halos. Instead of working on a flattened or composited image, add a new layer. Click on the new layer icon at the bottom of the layers palette:
Change the blend mode of the layer to Darken and use the clone stamp to eliminate the halo. (It doesn’t matter what the blend mode of the clone tool is.) If you get mismatching sky, fix it using a gaussian blur. Make sure the new layer is selected, click on Filter >> Blur >>; Gaussian Blur and apply enough blur to fix the problem. The blur will only be applied to the layer you were working on. It, of course, will only have the data from fixing the halo so you won’t cause yourself any other problems with the image.
Halos can ruin an otherwise great photo. Fix them quickly and easily in Photoshop.
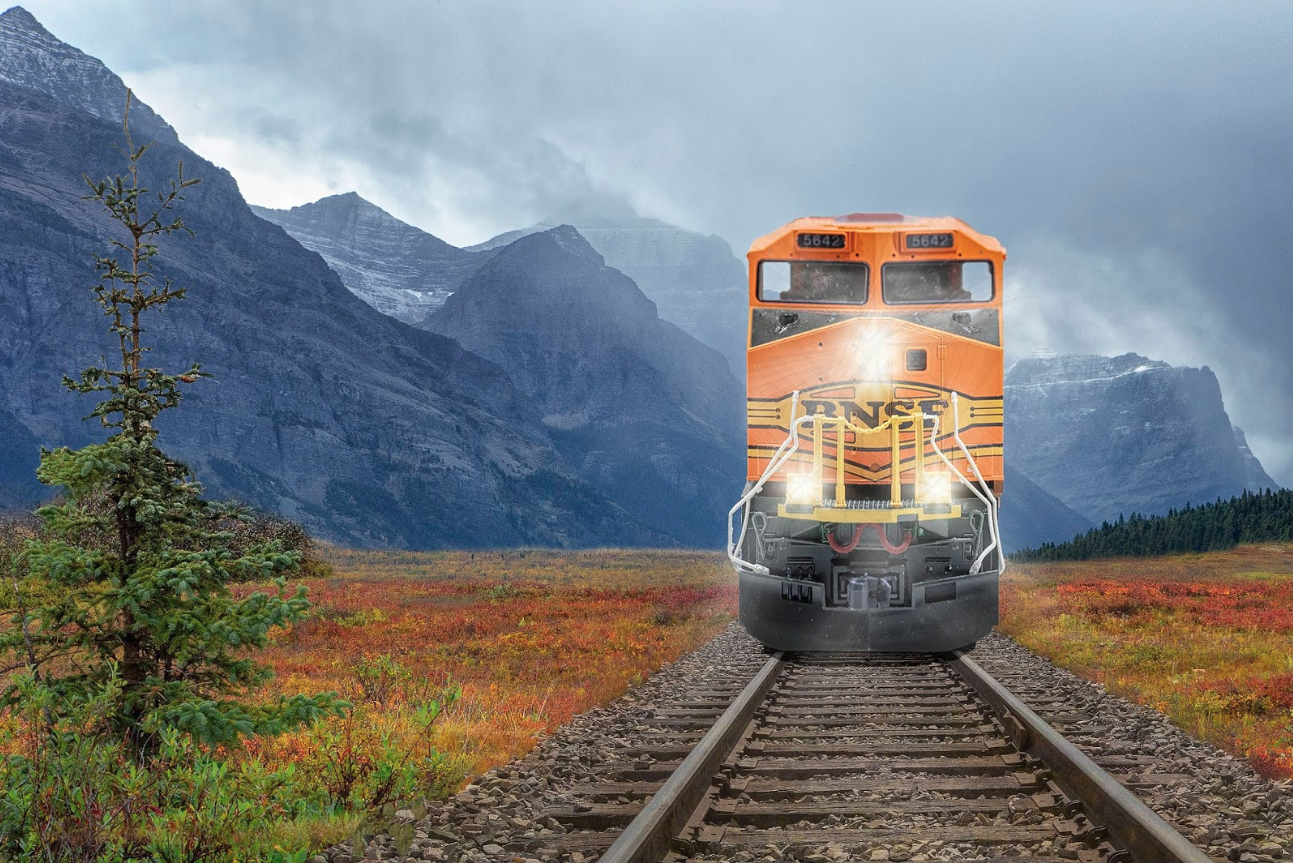
Photographing a speeding locomotive from the tracks in front of it is dangerous business; too dangerous for me. So, how did I make this photograph? While, not simple, I created a composite using an image of the mountains I had made in Glacier National Park, another with colorful foliage in Alaska, railroad tracks that I photographed in Granger, Texas and a locomotive I photographed in my kitchen. That’s right, I photographed it in my kitchen. You see, my friend Jim Doe let me use his BNSF model locomotive. It is so lifelike that no one would know it isn’t the real thing. I loaded all those images into Photoshop and went to work. I added an engineer from a photo I made of a Confederate officer at a Civil War re-enactment. This composite was the result. Who would think that the train in this photo is a model? I don’t know. It looks real to me and creating this image was completely safe.
I’ve heard it said that photographers should just delete any bad images as they come out of the camera. If it isn’t good now, they say, it won’t get better with time. There is a lot to be said for that, but I keep all my images. I will go through old images once in a while and in doing so, I’ve uncovered some that I didn’t think were keepers at the time. I’m sure I discarded one image of some gannets in New Foundland because the tip of the wing was cropped off. Otherwise it was a really nice image. My Photoshop skills have reached a point where I knew I could recreate the wing tip. So I fixed the wing and printed the photo. It won a second place in a local photo contest.
Sometimes when I look through some of my old photos, a Photoshop idea pops into my head. Look at the four photos below. None of them are “keepers” by themselves, but when I composited them in Photoshop, I think I produced a pretty good “altered reality” image. In fact, I am very pleased with the final image. Scroll down to take a look.
When I set up my camera and tripod in anticipation of making a photograph of this beautiful valley in Iceland, I hoped for something better than I ended up with. The sky was mostly cloudy but the sun would peek out through an occasional break in the clouds. As portions of the valley lit up, I would make an exposure; all the time hoping the sun would light up the mountain at the end of the valley and that a blue hole would open behind it. Unfortunately, the sky simply did not cooperate and this was one of the photos I was able to make.
While this photo is acceptable, it wasn’t what I was looking for.
Before I packed it in, I raised my camera, and using a wide angle lens, captured the scene with the blue hole that was high in the sky. That photo wasn’t very good because the blue sky wasn’t where I wanted it in the frame, it had too much sky and the valley was completely shaded.
As I made my photographs, I was thinking about whether I could make the shot I wanted in my post processing by combining the images that I had made.
When I got home I gave it a try. First, in Adobe Camera Raw, I opened twelve images I had made of the valley; all with different places lit by the sun. I made my adjustments,made sure that I had selected all the images and applied the adjustments to all of them. I then clicked on the “Done” button. With those same images selected in ACR, I clicked on Tools, Photoshop, Load Files into Photoshop Layers. When all the files were opened, I selected all the layers and changed the blending mode to “Lighten”. By changing the blending mode, all the lightest pixels were exposed so the entire valley was lit up. I liked the final product much better, but all the shadows were now lost. I then clicked on the eyeball next to each layer to see what it was contributing to the entire image. By turning off some of the layers, I was able to bring some of the shadows back into the image. When I found the combination I liked, I flattened the image and the result was much better than the original. Still I wasn’t satisfied.
In ACR, I opened the final photograph I made; the one with the bit of blue sky. I applied the same settings as I had made for the other images and opened it in Photoshop. Next I duplicated the layer by pressing CTRL J. I then clicked on Window, Arrange,, Tile All Vertically. Now I could see my two images side by side. I took the Move Tool, grabbed the top layer of the image with the blue sky and dragged it to the other image. While holding down the Shift key, I dropped the layer on top of the other image. Holding Shift ensures that the two images are aligned on top of each other perfectly. With the blue hole image on top, I went to the bottom of the Layers Pallet and while holding down the ALT key, I clicked on the Add a Layer Mask icon. Holding down the ALT key created a black mask that hid the entire layer. Next I clicked on the background layer and using the Quick Selection Tool, I selected the sky. I then selected the blue hole layer mask and hit the DELETE key. That painted the mask white in the selected area and revealed the blue hole layer in the selected area. The blue hole was perfectly placed. (If it had not been where I wanted it, I would have used the Move Tool to position the layer in such a way that the blue sky was where I wanted it.)
I then pressed CTL ALT SHIFT E to flatten the layer above the other layers. I converted it to a smart object and applied select filters from Nik’s Color Efex Pro 4. I then used Nik’s Viveza to make some targeted adjustments to the mountain top, adding the light I had hoped I would get from the sun as well as adding a little saturation.
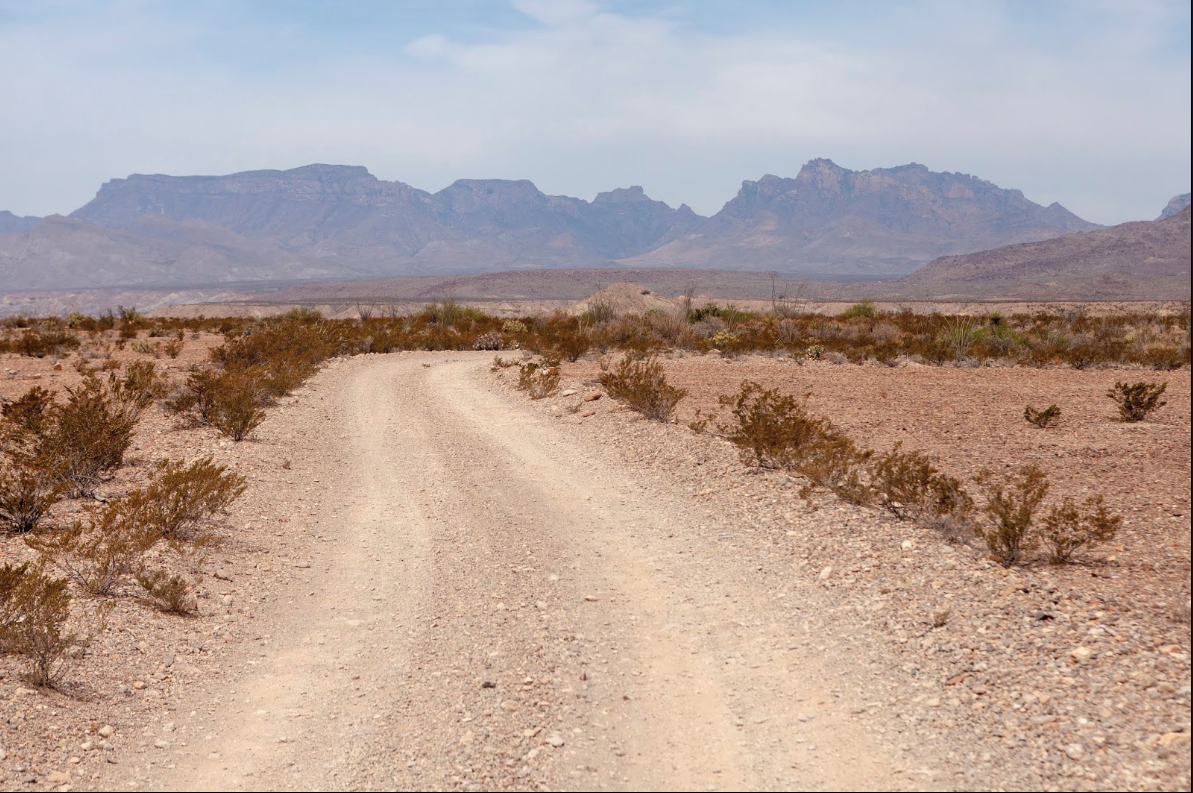
While I captured the light I wanted via stacking and getting the sky I wanted by compositing the sky from a photo made during the same stop, I still wasn’t completely satisfied with my shot. I liked everything about it except the foreground. I thought it needed more or none at all because I thought that what I had was more of a distraction than a photographic element.
I looked through my images and found another one I made at the same location but at a shorter focal length. I was able to move the foreground from that image to my stacked image and it worked well.
Here is the final result.
This is the image I set out to create. When the sun and sky didn’t cooperate, I took what they gave. When my eye didn’t capture the best foreground, I inserted the foreground from another image. In the end, I created the image I was after.